The Bank of Canada made its announcement today and decided to hold interest rates steady.
No hike. No cut.
Pretty neutral headline… but here’s the thing:
Saskatoon’s market doesn’t feel neutral right now at all.
What the rate hold actually means
The Bank is basically in wait-and-see mode.
Inflation is improving
The economy is slowing a bit
But they’re not ready to cut yet
So rates stay where they are… for now.
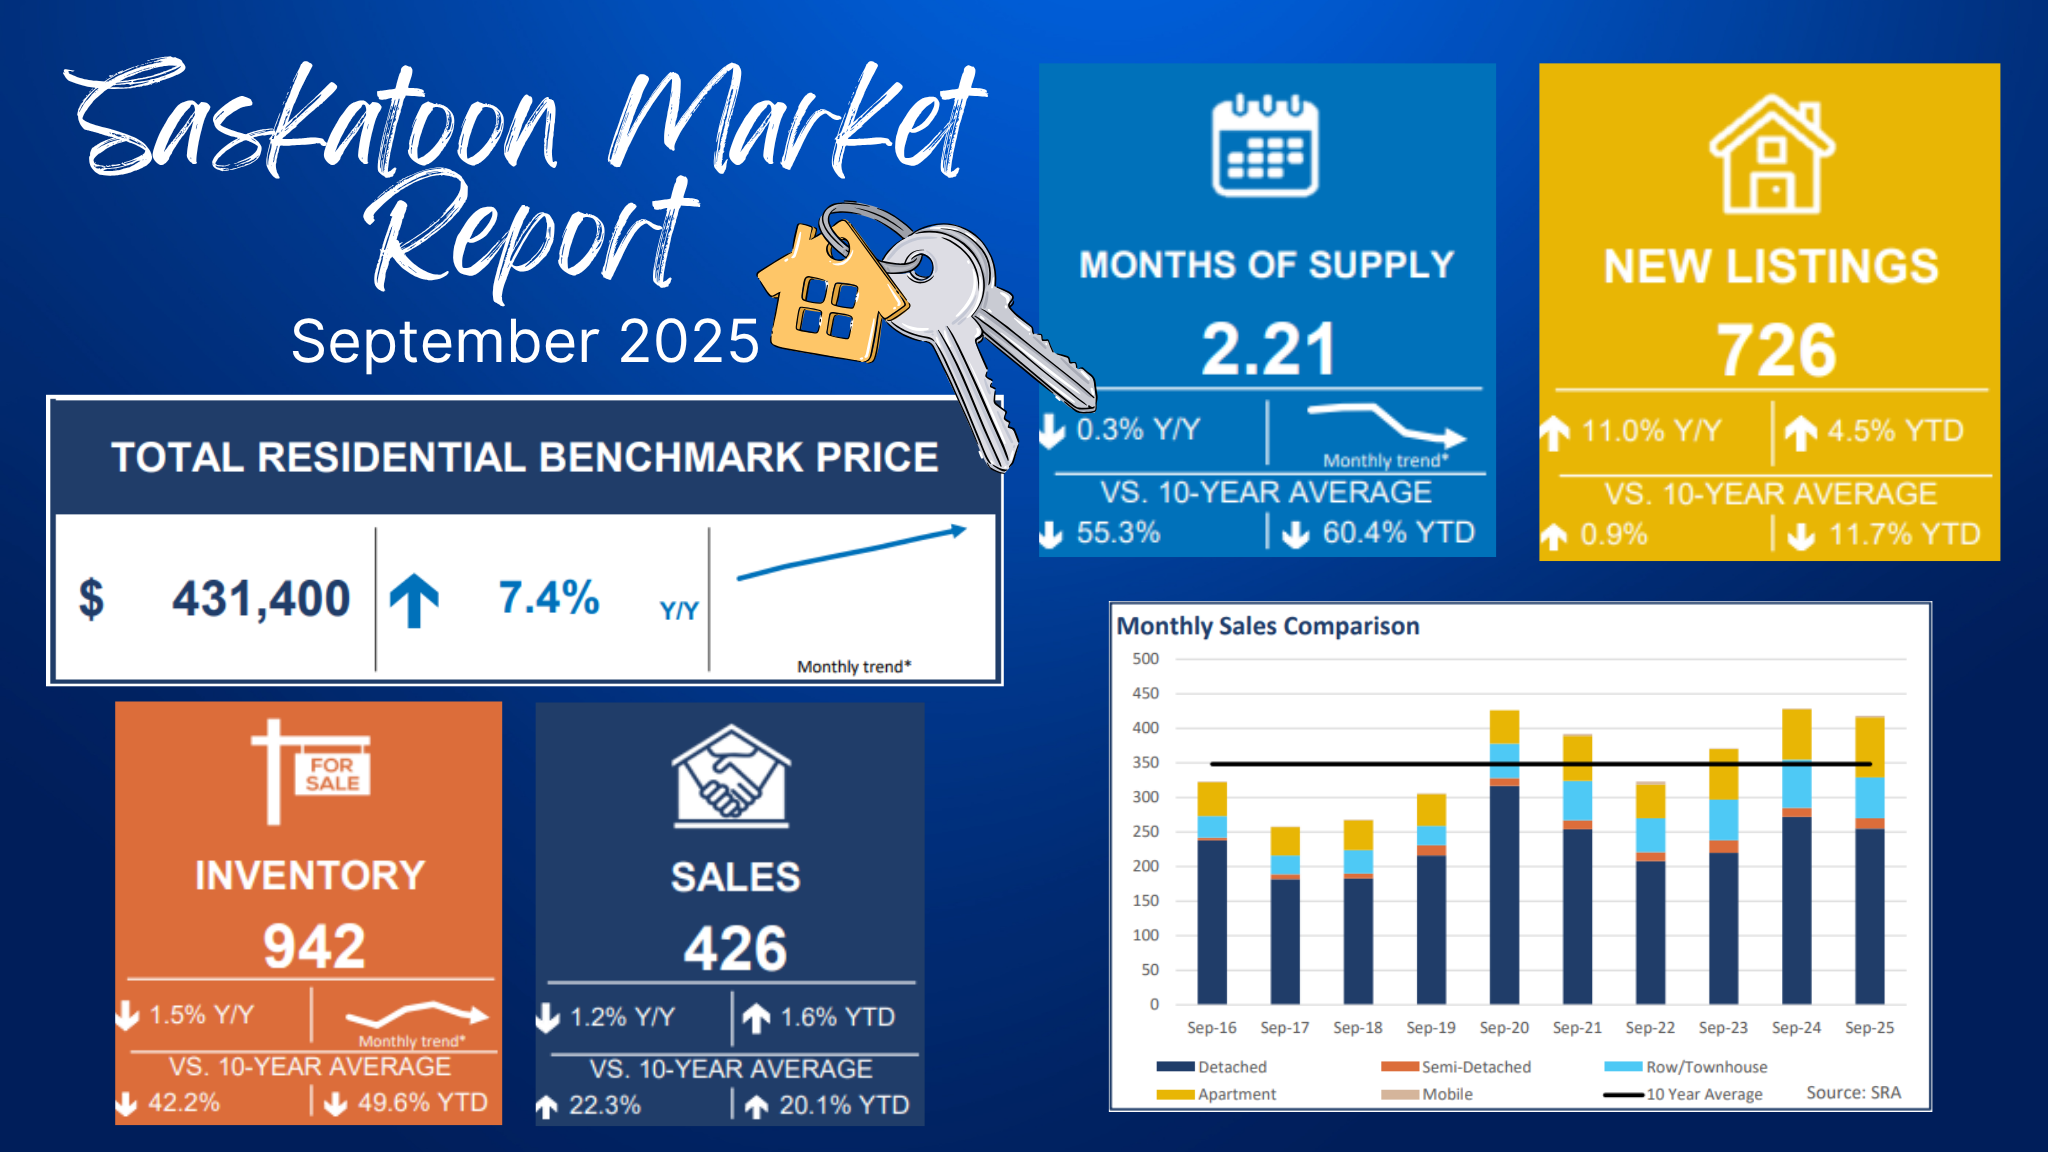
Meanwhile in Saskatoon
While rates are holding, Saskatoon’s housing market is doing its own thing.
Well-priced homes are moving fast
Multiple offers are still happening
Inventory is tight in a lot of price ranges
Especially in that $350K - $600K range, things are competitive.
So even though rates haven’t dropped yet…
Demand hasn’t gone anywhere.
What this means for buyers
This is the part most people are trying to figure out.
You’re probably thinking:
“Do I wait for rates to drop?”
Here’s the reality right now:
Rates are stable (which helps with planning)
But prices are holding strong or creeping up
And competition is still there
So waiting might get you a better rate later…
But you could be competing with more buyers when that happens.
What this means for sellers
This is a pretty solid window.
Buyers are active
There’s still urgency in the market
And you don’t have the uncertainty of rising rates scaring people off
If your home shows well and is priced right…
You’re still in a strong position.
The bigger picture
We’ve shifted out of the “rates are climbing every month” phase.
Now we’re in a more stable environment, and that’s huge.
Because when things stabilize:
Buyers regain confidence
Sellers feel more comfortable listing
Deals actually start coming together again
Where this is likely going
Most people expect rate cuts eventually… just not overnight.
And when that happens?
More buyers jump in
Competition increases
Prices can get pushed up even more
That’s why this current moment is kind of interesting.
It’s not the cheapest rates…
But it’s also not peak chaos either.
The takeaway (Saskatoon version)
Rates held today.
But locally?
The market is still moving.
If you’re waiting for everything to line up perfectly - low rates, low prices, no competition - that moment usually doesn’t show up.
It’s more about timing your move based on your situation.
If you’re trying to figure out your next step
Whether you’re buying, selling, or just watching things…
We can map it out properly.
No pressure, no sales pitch - just what actually makes sense for you in this market.
Shoot me a message anytime